

9 Easy Steps for Restoring MD3000i Controller to Factory Settings
Posted by Dylan Kerling, Dell Certified Technician on 21st Jan 2020
Tech Tip #11: Restoring MD3000i Controller Settings to Factory Defaults
Not sure how to restore your MD3000i controller to factory settings? The following tutorial will take you step by step through the process.
Step 1
Install PUTTY and Dells Modular Disk Storage Manager software on the computer you plan to use for array management. You may also need a password reset cable if you cannot get access to the management port IP address.
Step 2
Plugin the management port ethernet cables on your MD3000i controllers. Have an IP set up on your management computer to match the default IP subnet. The default IP for the management ports are:
Controller 1: 192.168.128.101
Controller 2: 192.168.128.102
There is a chance that the controllers may be set to a DHCP. If it is, you may get IP the addresses for there.
Step 3
After you have everything plugged in, and a static IP set to match the default management IPs for the controllers, launch the Modular Disk Storage Manager software on your array management computer.
Step 4
In the software, attempt an "auto discover", and see if the system can pick up either the default management IP addresses or some DHCP assigned addresses.
If they don't show up, continue on. If they do show up, skip down to the final steps, labeled, "Success with auto discover!"
If you did not get any hits on the management IP from the "auto discover" tool, you must use the password reset cable and a program, like PUTTY or another telnet program, to connect into the controllers to reset the IP addresses. The setting for the telnet program are as follows:
Baud rate: 115200
Data bits: 8
Stop bits: 1
Parity: None
Flow control: None
Step 5
After PUTTY has launched, plug the password reset cable from the serial port on your computer to the port on the controller. You should now be able to use commands.
Press "ctrl+pause/break", and a prompt will come up that says, "press 'S' to enter service interface." When you press "S", it will prompt you to enter a password. The default password is: supportDell and it is case sensitive (see pictured below).
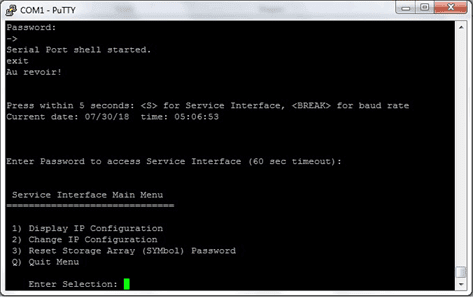
Step 6
After the password is entered, it will give you four options. Option two is, "set the IP address for the management port. Set it to an IP that the management computer can reach and save the settings.
Step 7
Once you’re done on the first controller, plug the password reset cable in the second
controller and repeat the process. However, give the second controller an IP address within the same subnet.
Step 8
Your IP information should now be set properly. Attempt an "auto discover" within the Storage Manager. It should now discover your storage array.
Step 9
Your storage array should now be manageable. Right-click the device in the list and select "execute scripts". In the script Editor, type, "clear storageArray configuration all" (see picture below), and execute the script.
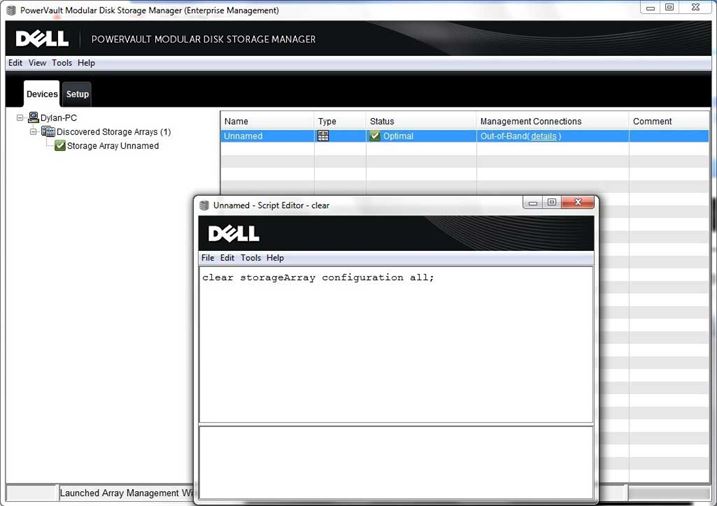
It will cause the entire array to restart on the next boot. It will have removed all configuration information from the arrays, and it should be back at factory settings.