

How To Upgrade Firmware - Generation 11 Servers & Up
Posted by Dylan Kerling, Technician on 9th May 2018
TechTip #1: 10 Easy Steps To Upgrade Firmware - Generation 11 Servers & Up

Since firmware carries out the integral functions of hardware, updates are needed from time to time so that corresponding devices can operate proficiently. Below are 10 simple steps to upgrade your firmware on servers that are classified as generation 11 and up. This method of upgrading uses the lifecycle controller.
- Boot the server and press F10 during the post. You will notice it will reference "entering system services" or "lifecycle controller," depending upon the model of your server.

Image 1: Dell Serve LifeCycle Menu - Once the server has booted into the lifecycle controller, you will see, on the left-hand column, a "firmware update" or a "platform update," depending on what generation server you have. Click this option, and it will give you several links within the right side of the screen. Click on the "Launch firmware update" option at the top.
- Once there, you will have three options to select. Click on the "FTP server" option.
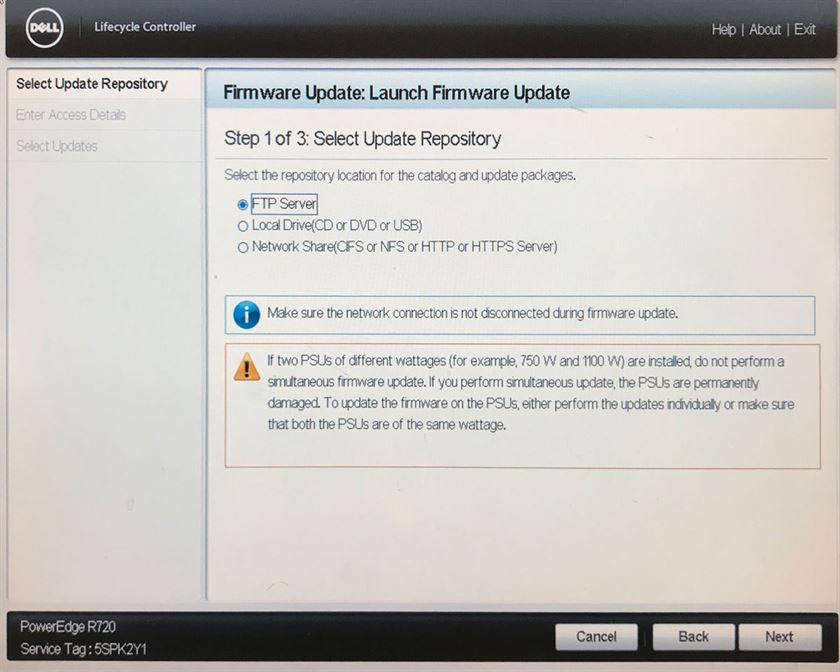
Image 2: Step 1 - Select Update Repository - If you have never configured a NIC within the lifecycle controller, it will give you a message saying "Network is not configured" and ask if you would like to configure it now. Click "Accept" to go into the NIC configuration.
- Once you're in the configuration, you will see a list of available NIC ports to configure. Select one that has a cable plugged into it. You will see the options of "static" or "DHCP" configuration. Select whichever applies to your network. Once selected, click "finish" on the bottom right corner.
- When the NIC port set up has been successfully configured, the system will send you back to the initial selection of "FTP server," Local Drive, and Network Share. Select "FTP Server" again.
- Now that the NIC is configured, the system should send you to a page with several fields. The top field should be filled in already with "ftp.dell.com." You may leave the rest of the options blank. Now, click "next" on the bottom right corner.
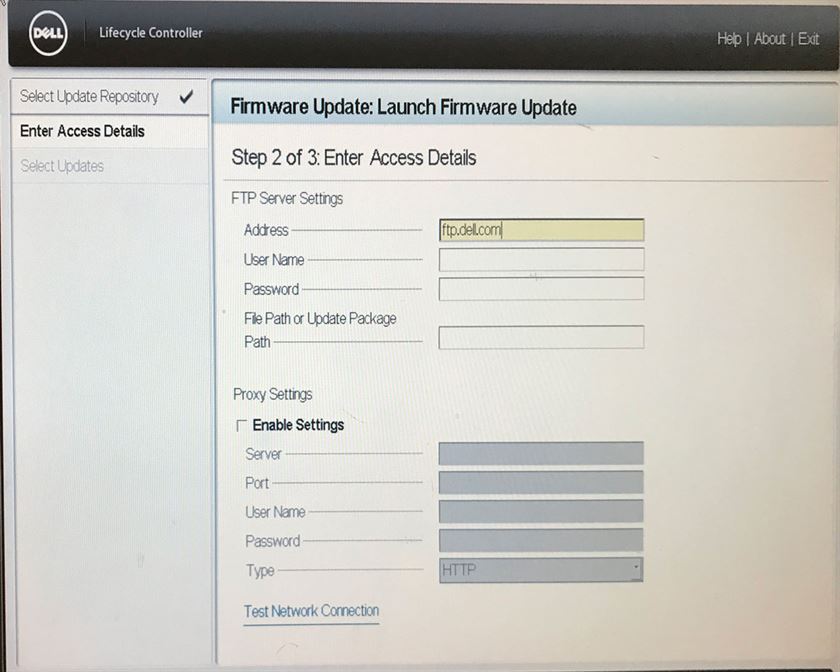
Image 3: Step 2- Enter your Access Details - The system will now start connecting to the FTP server and will likely take several minutes to go through and detect all of the potential updates.
- After it has found all the potential updates, the system will bring you to a list where you can select which devices to update. Once you've chosen your devices and clicked "accept," it will start downloading all of the updates that were selected. The updates will run automatically. The system will likely reboot several times during the update process. The number of reboots will depend on how many updates are selected.
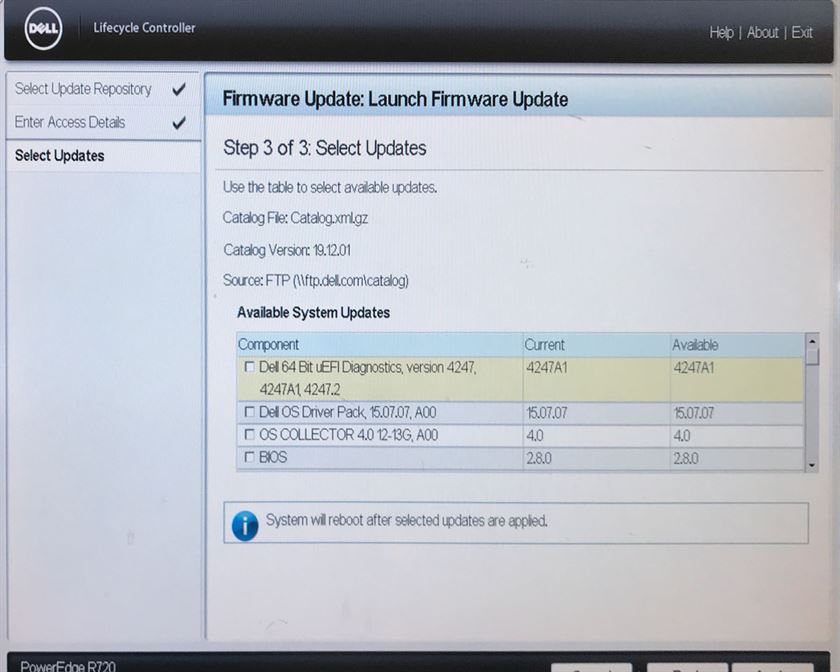
Image 4: Step 3- Select Available Updates for Server Found - You will know the update is complete when it sends you back into the lifecycle controller a final time and does not go back into the "firmware" updater window.
Call today to learn more from a network specialist at 651-633-0095.
Find additional Velocity Tech Solutions Tech Tips at #VTStechtips